Mods
Mods belong to one instance. Open the instance before managing its content so the game version and destination are unambiguous.
Discover mods
- Open an installed instance.
- Select Discover mods.
- Choose CurseForge or Modifold from the source selector. Enter at least four characters in the search field above the filters, then press Enter or select the search icon that appears inside the field. Choose a category or sort order when needed.
- Select a result to open its separate overview page and inspect its files, supported versions, screenshots, and author.
- Select a compatible file and install it, or use Back to return to the catalog.
You can also select several compatible results and select Install at the right of the top bar. Incompatible files are disabled for the current game version.
After confirming a catalog installation, Hyprism opens the instance overview. The Discover mods card stays unavailable while its status badge shows progress. Select the badge to Cancel. Cancellation or a failed download discards the whole batch, including its downloaded dependencies; mods installed before the operation keep their files and settings.
Hyprism retrieves catalog data and files from CurseForge or Modifold. The project page button opens the listing on the selected source in your browser. Modifold browsing and downloads do not require an API key or account in Hyprism. CurseForge uses an API key that Hyprism retrieves automatically at startup. Required dependencies from both catalogs are installed automatically before the selected mod. Modifold uses a specified dependency version when one is declared; otherwise Hyprism chooses a compatible version. Optional and embedded dependencies are not downloaded separately.
Manage installed mods
- Open an installed instance and select Installed mods.
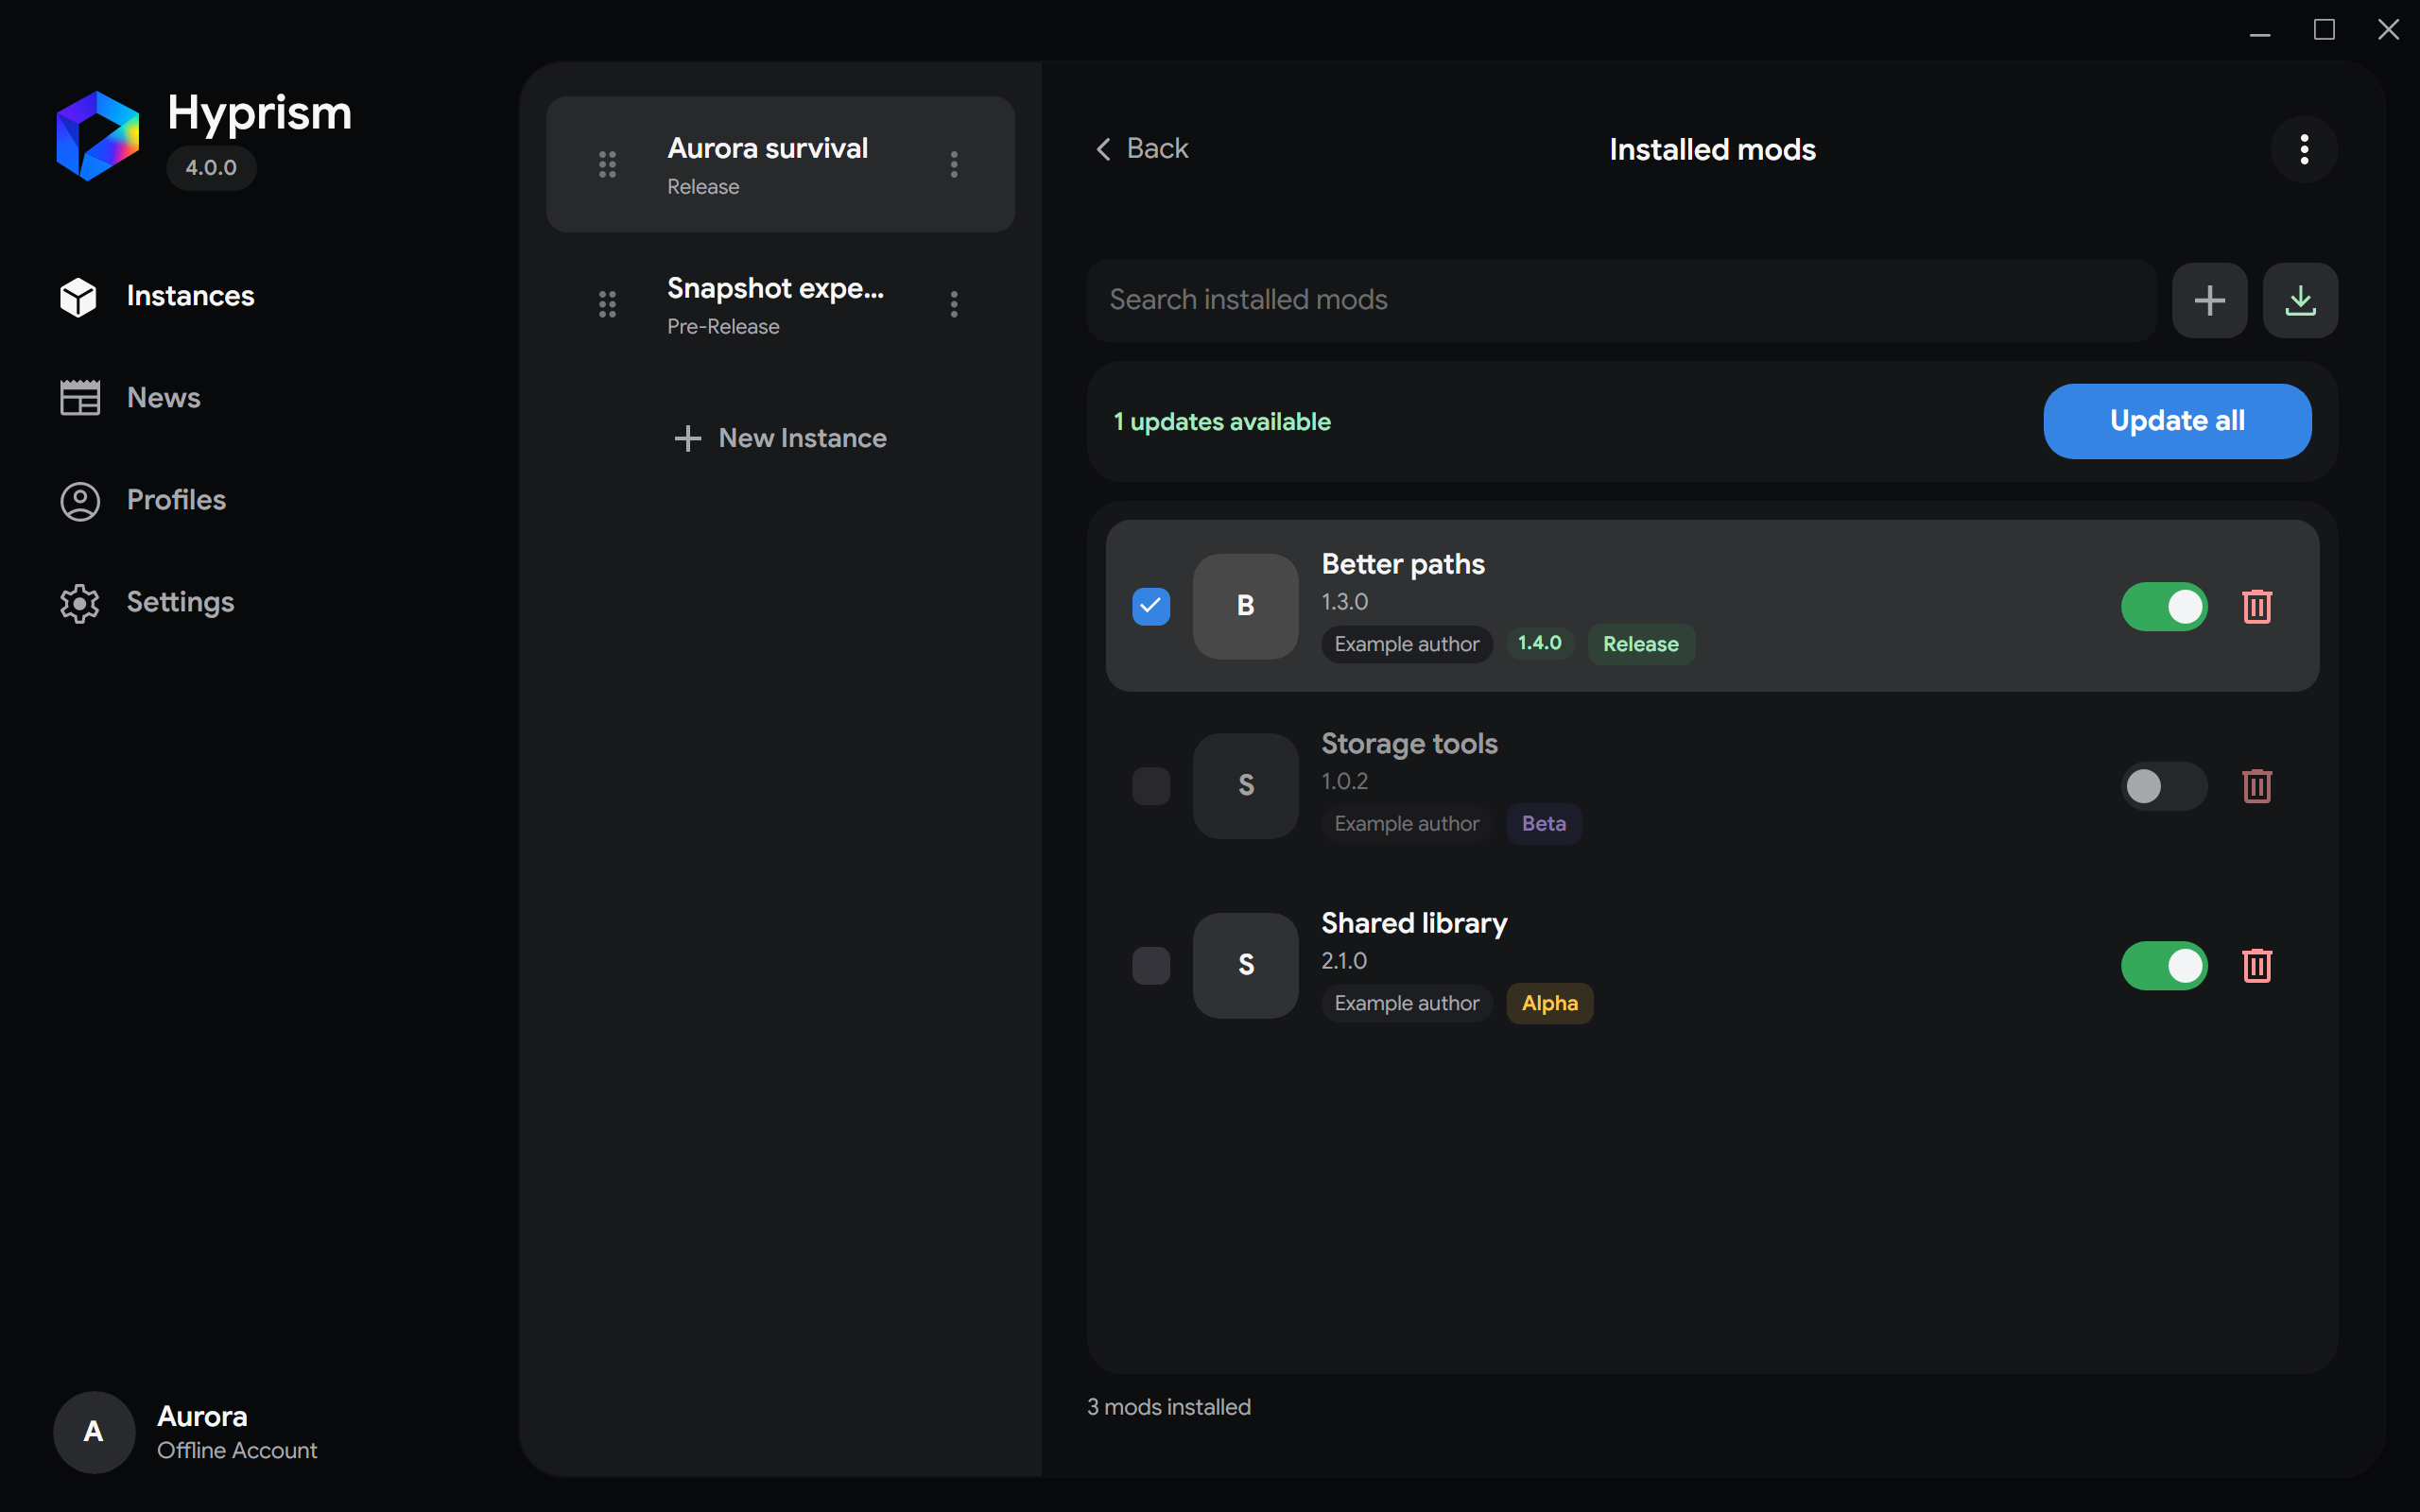
- Enter a mod name or author in the search field at the top. The list updates while you type. Press Esc or click outside the field to end text entry and keep the query.
- Use the buttons beside the search field to Add mod or Check for updates. Hover an icon to see its action name. The list refreshes automatically after importing, installing, deleting, or updating mods.
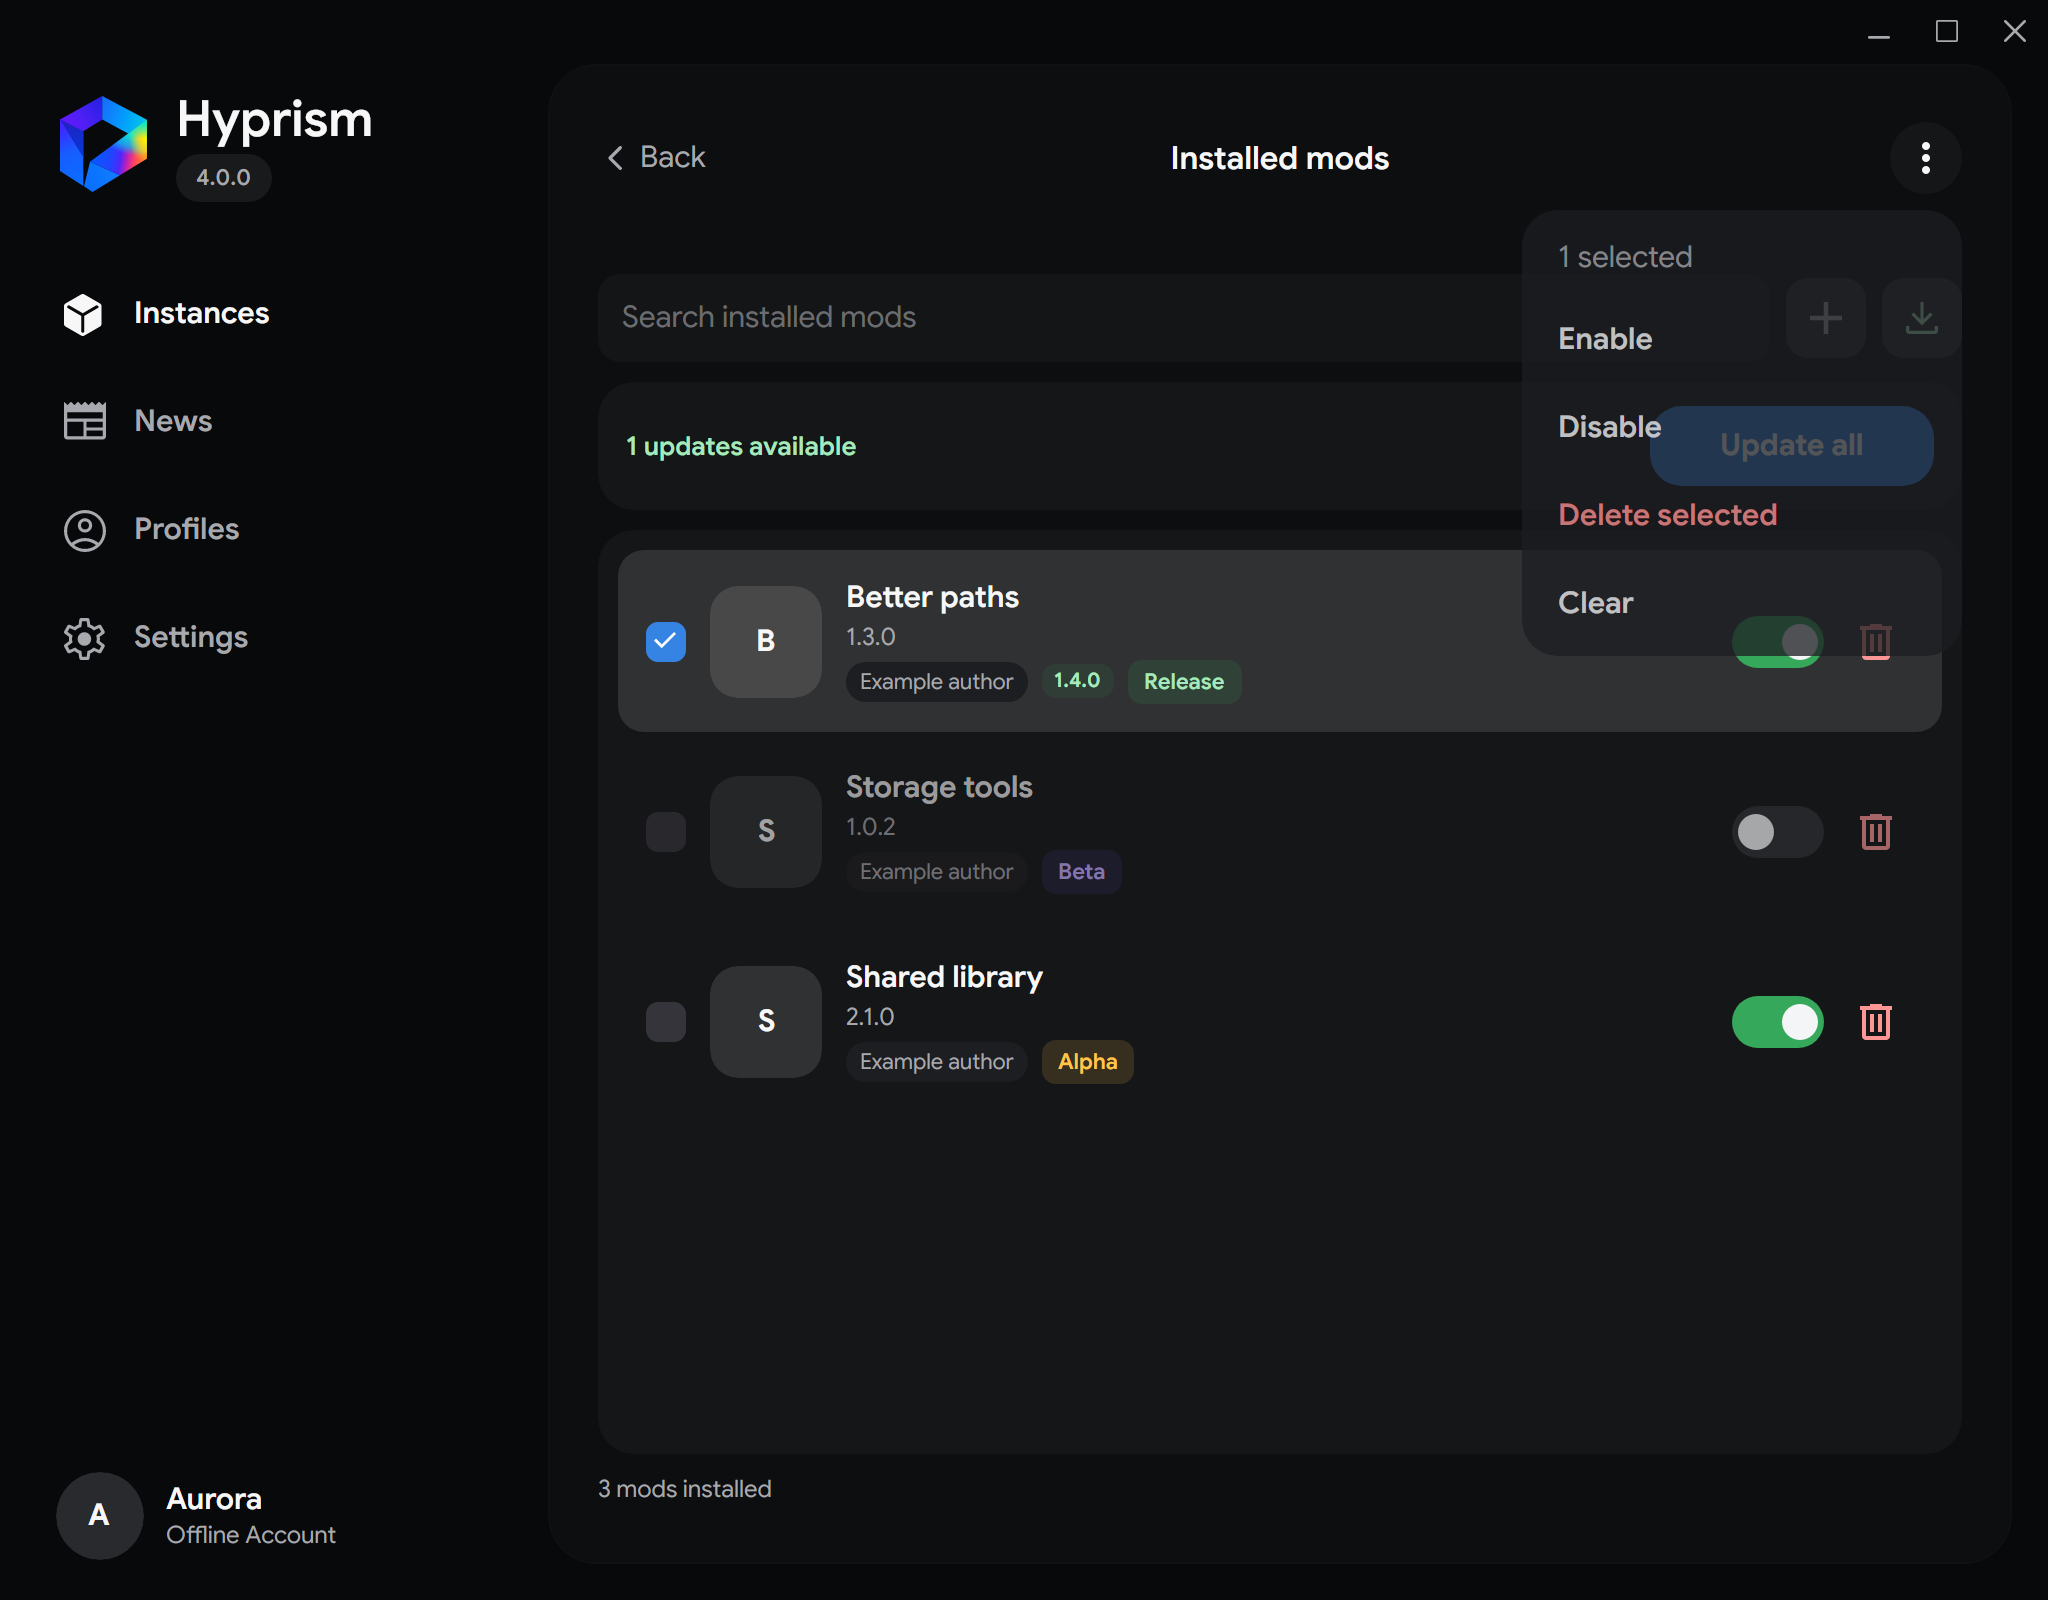
- Select the checkboxes beside mods, then open the three-dot menu at the right of the top bar to enable, disable, delete, or clear the selection.
Each row shows the mod name, installed version, author, and release type. The switch and delete button are on the right; available updates appear beside the author. Release badges are green, beta badges are purple, and alpha badges are yellow.
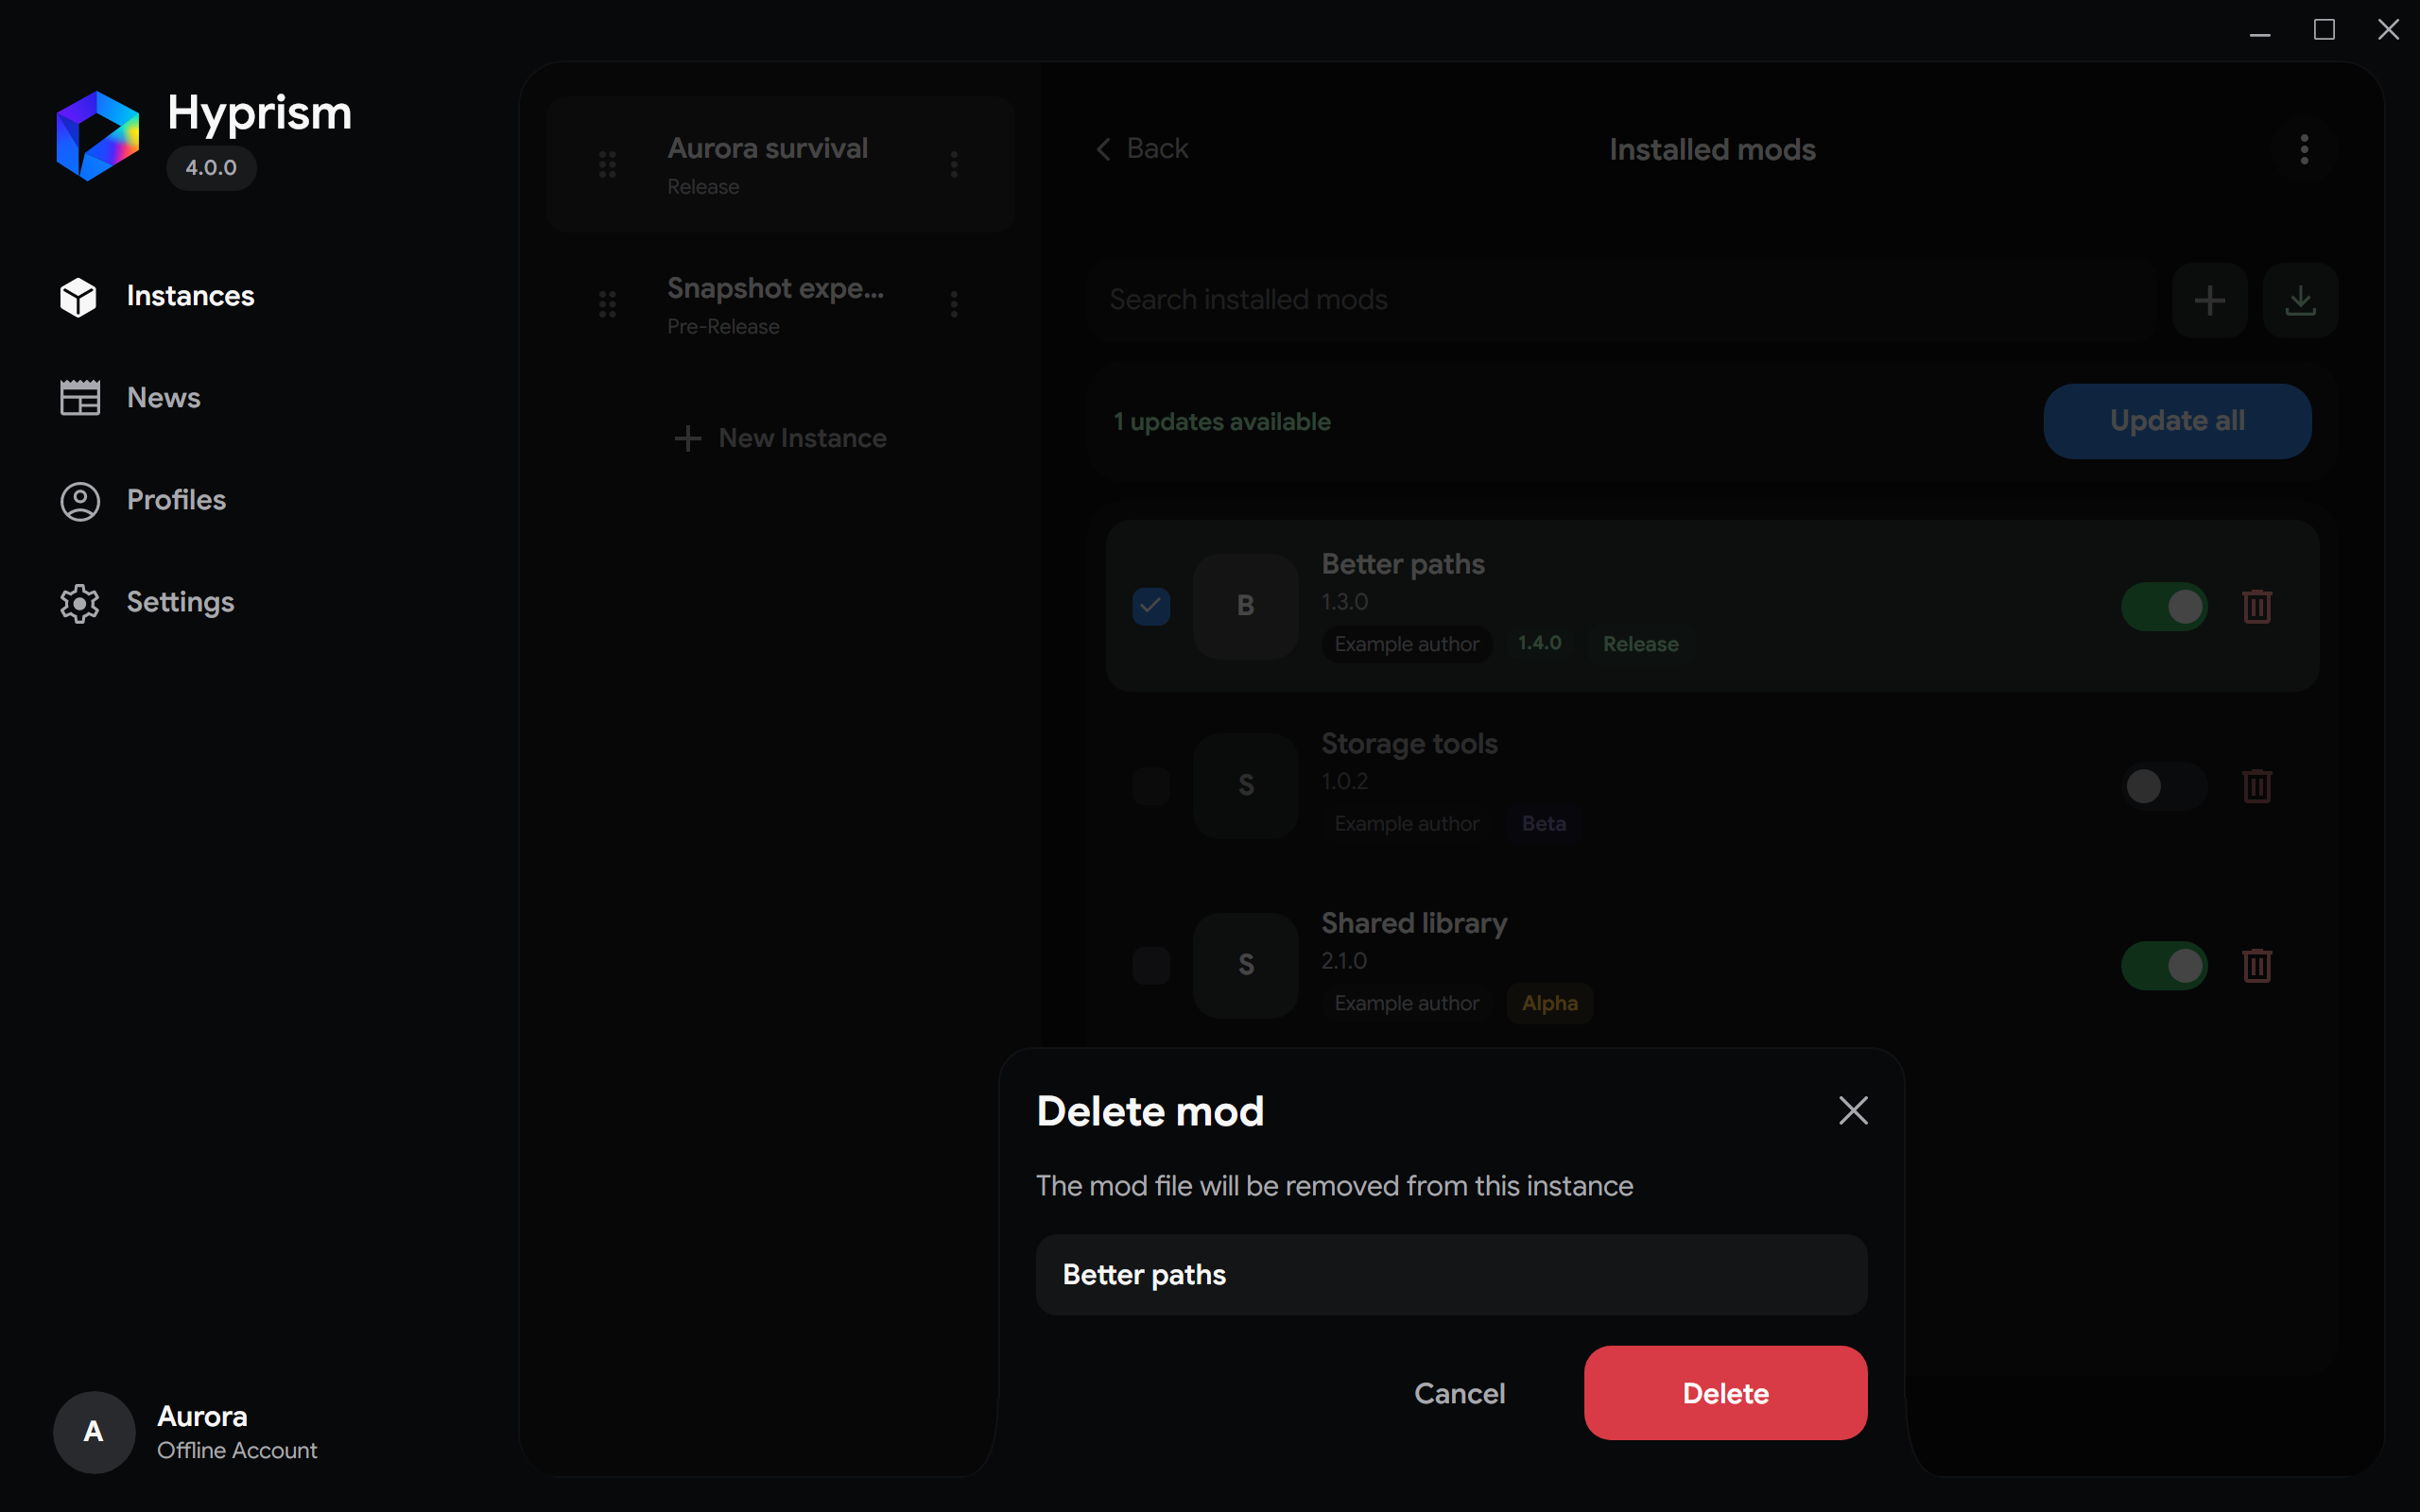
To delete one mod, select the trash icon on its row. Check the mod name in the confirmation overlay and select Delete to remove its file from the instance, or Cancel to keep it.
Import local files
Open Installed mods, then use the import action or drop .jar and .zip files onto the list. Hyprism copies accepted files into the selected instance.
Only import mods from sources you trust. A mod executes with the permissions of the game process.
Enable, disable, and delete
- Use the switch on a row to enable or disable one mod.
- Select several rows and open the three-dot menu for bulk enable, disable, or delete actions. Bulk deletion removes the selected files from the instance.
- Use the trash icon on a row to delete one mod after confirmation.
- Search filters the installed list by mod name or author.
Disabled files stay in the instance so they can be enabled again without downloading.
Update mods
Select Check for updates to compare installed CurseForge files with compatible releases. When updates are available, update one mod or use Update all. Modifold updates are not included in this check.
Back up the instance before a major mod change when a world depends on that mod. Hyprism does not guarantee save compatibility between mod versions.